
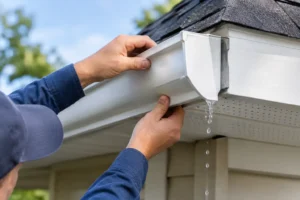
A gutter can appear to be working normally until a hard coastal rain sends a narrow stream of water down one end. If you need to fix a leaking gutter end cap, acting early matters. That small leak can soak fascia boards, stain siding, erode planting beds, and direct water toward the foundation every time the gutter fills.
For homeowners along the Grand Strand and throughout North and South Carolina, end-cap leaks are common after years of humidity, wind-driven rain, pine debris, and seasonal temperature changes. The right repair depends on whether the existing end cap is sound, the sealant has failed, or the gutter itself has begun to pull away from the roofline.
Why Gutter End Caps Start Leaking
An end cap closes off the open end of a gutter run. It is usually secured to the gutter with a combination of mechanical fastening and gutter sealant. When either connection fails, water finds the gap under pressure, especially during a tropical downpour or when a gutter is partially clogged.
Most end-cap leaks begin with aging sealant. Over time, sealant can dry out, crack, shrink, or separate from aluminum. In coastal areas, persistent moisture and heat speed up that process. A branch impact, ladder contact, or gutter movement can also loosen the cap enough to create a leak.
The leak is not always limited to the end cap itself. Standing water may indicate a gutter that has lost its proper slope toward the downspout. Overflowing water can point to a blocked outlet, a clogged downspout, or debris filling the gutter. Sealing an end cap without addressing those conditions may stop one drip while leaving the larger drainage problem in place.
How to Fix a Leaking Gutter End Cap
A lasting repair starts with a close inspection in dry weather. Look inside the gutter and along the outside edge of the cap. If the cap is firmly attached and the metal is not bent or corroded, resealing it is often enough. If it is loose, split, severely misshapen, or repeatedly leaking after repairs, replacement is usually the better choice.
Clean and dry the repair area
Gutter sealant will not adhere reliably to wet metal, loose debris, roof grit, or remnants of failing caulk. Remove leaves and sediment from the gutter, then scrub the inside seam around the end cap. A stiff brush and a clean rag are generally sufficient. Carefully remove cracked or peeling old sealant with a putty knife or scraper without damaging the gutter.
Allow the area to dry completely. This is where many quick repairs fail. Even a small amount of trapped moisture can prevent a proper bond, particularly in humid Myrtle Beach, Murrells Inlet, or Pawleys Island conditions. Plan the work for a dry stretch of weather and avoid applying sealant when rain is expected before it can cure.
Reseat a loose cap before sealing
If the end cap has shifted but remains in good condition, press it firmly back into position. Depending on the gutter style, a professional may use the appropriate fastener or crimping method to secure the cap before resealing. Sealant should reinforce a properly fitted connection, not serve as the only thing holding a loose end cap in place.
Be cautious about adding screws at random. A poorly placed fastener can create another path for water, distort the gutter, or interfere with the cap’s fit. On older aluminum systems, the surrounding metal may be thin enough that replacement provides a more dependable result than forcing a weakened cap back into service.
Apply gutter sealant to the inside seam
Use a sealant specifically rated for gutters and exterior metal. Apply a continuous, generous bead along the inside seam where the end cap meets the gutter trough. Smooth it into the joint so there are no gaps, pinholes, or thin spots at the corners.
The inside seam is the priority because it is where water sits and presses against the connection. Applying sealant only to the exterior may make the gutter look better temporarily, but it does not always stop water from entering the joint. Follow the manufacturer’s cure-time instructions before testing the repair with a hose.
Replace a damaged end cap
A cracked or heavily corroded cap needs replacement. The old cap must be removed, the gutter edge cleaned, and the replacement matched to the gutter profile and side of the run. Right and left end caps are not interchangeable on many systems.
This is also a good time to inspect the entire gutter section. If seams are opening, hangers are loose, or the fascia is soft from long-term leakage, replacing only the cap may not resolve the underlying damage. A professional inspection can identify whether the system needs a localized repair, re-pitching, or a more comprehensive correction.
Test the Repair and Watch Where Water Goes
After the sealant has cured, run water into the gutter with a hose. Start with a moderate flow, then increase it to simulate a heavy rain. Check the end cap from below and inspect the ground near the home for drips, splashing, or water pooling.
A successful end-cap repair should keep water inside the gutter and move it smoothly toward the downspout. If water still reaches the end cap and backs up, do not assume the new seal has failed. The gutter may be holding water because of an incorrect pitch, an obstructed downspout, or debris near the outlet.
Also look at the fascia behind the gutter. Dark staining, peeling paint, soft wood, or mildew can signal that the leak has been active longer than expected. Water behind the gutter can cause costly wood rot before the damage becomes visible from the ground.
When a DIY Repair Is Not the Best Option
A simple reseal can be manageable for a homeowner with safe ladder access and a low, stable roofline. It becomes less practical when the gutter is on a second story, the roof is steep, the ground is uneven, or the leak is near damaged fascia. Wet coastal conditions make ladder work especially risky.
Professional repair is also the sensible choice when an end-cap leak accompanies overflow, sagging, recurring clogs, or water pouring behind the gutter. These symptoms require a drainage assessment, not just a tube of sealant. An experienced technician can evaluate gutter pitch, hanger spacing, downspout capacity, outlet restrictions, and the condition of the surrounding roof edge.
For second homes and vacation properties in areas such as North Myrtle Beach, Surfside Beach, Georgetown, and Conway, a professional inspection offers another advantage: problems can be corrected before an unattended storm turns a small leak into damaged trim or interior moisture.
Keep Debris From Making the Leak Worse
A leaking end cap often gets noticed during a clog because standing water raises the pressure against every seam. Cleaning the gutter may reduce that pressure, but routine ladder cleaning is not an ideal long-term plan for many homeowners, particularly where pine needles, shingle grit, insects, and windblown debris accumulate quickly.
Professionally installed stainless-steel micro-mesh protection helps keep the gutter trough clear while allowing rainwater to enter. It does not replace a damaged end cap or correct poor gutter pitch, but it can reduce the clogging and standing-water conditions that expose weak seams. A properly configured guard system should also account for roof design, local debris exposure, and high-volume rain.
Clearwater Rain Gutters has served Carolina homeowners since 2006 with inspections that look beyond the visible drip. A repair recommendation should be based on the condition of the cap, gutter run, fascia, and drainage path, with clear pricing and no pressure to replace components that can still perform safely.
If an end cap is dripping, do not wait for the next storm to show you how far the water can travel. Schedule a professional inspection while the issue is still contained, and give your gutter system the repair or protection it needs to keep water where it belongs.
Leave a Reply
You must be logged in to post a comment.