
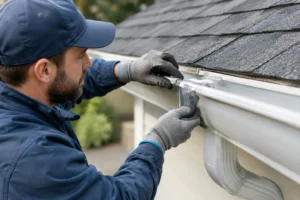
A leak that drips from a gutter seam may look minor on a dry afternoon. During a Myrtle Beach downpour, however, that same weak point can send a concentrated stream onto fascia boards, siding, flower beds, and the soil beside your foundation. Knowing how to repair gutter leaks starts with finding out why water is escaping in the first place – and whether the gutter system can still move water properly when it matters most.
For homes along the Grand Strand and throughout coastal North and South Carolina, wind-driven rain, pine needles, roof grit, humidity, and salt-air exposure can turn small gutter issues into recurring maintenance problems. A sound repair addresses both the visible leak and the condition that caused it.
Start by Finding the Source of the Leak
Water often travels along the bottom of a gutter before it drops, so the spot where you see dripping is not always the failure point. Inspect the system on a dry day from the ground first, then use a stable ladder only if you can do so safely. For many homeowners, especially those with a second home or limited access to the property, a professional inspection is the safer choice.
Look for water stains, rust, peeling paint, darkened fascia, soil erosion, or mildew below the gutter line. Then check the gutter interior for leaves, pine straw, shingle granules, nests, and standing water. A clogged gutter can force water over seams and corners that would otherwise remain watertight.
Common leak locations include end caps, corner joints, seams between gutter sections, screw holes, downspout outlets, and small punctures in the gutter trough. Sagging sections can also create low spots where water sits for too long and eventually finds a path through failed sealant.
Test the system with a hose
After clearing loose debris, run water into the gutter with a garden hose. Begin near the end opposite the downspout and work in short sections. This lets you see whether the water flows smoothly, pools in one area, backs up at an outlet, or escapes from a joint.
Avoid using a high-pressure setting. It can drive water into vulnerable seams and make a manageable inspection problem look worse than it is. The goal is to mimic steady rainfall, not power-wash the gutter.
How to Repair Gutter Leaks at Seams and End Caps
Seams and end caps are among the most frequent sources of leaks because they depend on a durable seal. Old caulk eventually dries, cracks, or loses its bond, particularly after repeated heat, storms, and humidity.
For a small seam or end-cap leak, clean the area thoroughly before applying new sealant. Remove loose debris and old failing caulk with a putty knife or scraper. Dry the metal completely, then use a gutter-specific, exterior-grade sealant designed for the gutter material. Apply a continuous bead along the inside of the seam or end cap, smooth it into place, and allow it to cure according to the manufacturer’s directions before testing with water.
Do not seal over wet, dirty, or heavily rusted metal. The repair may hold briefly, but it will not create a dependable bond. If an end cap is bent, separated, or corroded through, replacement is usually more reliable than adding more sealant.
Repair Small Holes Without Ignoring Larger Damage
Tiny holes from corrosion, fasteners, or impact damage can sometimes be patched. Clean and dry the surrounding metal, lightly abrade the surface to help the patch adhere, and cover the damaged area with an exterior-rated metal patch and compatible gutter sealant. The patch should extend beyond the hole on all sides so water cannot work underneath its edges.
This approach is best for isolated, small damage on an otherwise sound gutter. A gutter with multiple holes, widespread rust, splitting seams, or thin metal has reached the point where repeated patching becomes a short-term expense. Replacing that section may protect the home better and cost less over time than cycling through repairs after every heavy storm.
Vinyl gutters require a different approach. Some adhesives and sealants that work well on aluminum do not bond properly to vinyl, especially as the material expands and contracts. Use products approved for vinyl gutters, and replace cracked sections rather than trying to seal a fracture that continues to move.
Correct Slope, Hangers, and Downspout Problems
A leak is sometimes a drainage problem in disguise. Gutters need a subtle slope toward the downspout so water does not pool. If water remains in the gutter after your hose test, loose hangers or an incorrect pitch may be pulling the system out of alignment.
Tightening a single loose hanger can help, but it is not always the full answer. Check for fasteners pulling away from deteriorated fascia, sections that bow under the weight of debris, and joints that separate when the gutter shifts. Any repair should restore a secure attachment without driving fasteners into soft, rotted wood.
Downspouts deserve equal attention. A clogged elbow or crushed downspout can slow the entire system, causing water to rise and escape at seams near the top of the gutter. Clear blockages, confirm the downspout is firmly connected, and make sure its discharge directs water away from the foundation. Water that lands next to the house can contribute to erosion, crawl-space moisture, mold, and settlement concerns even when the gutter itself no longer leaks.
Know When a Leak Calls for Professional Repair
Some gutter repairs are reasonable for a capable homeowner, but certain warning signs call for an experienced gutter specialist. This is particularly true on two-story homes, steep roofs, properties with difficult landscaping, and homes exposed to regular coastal storms.
Schedule an inspection when leaks accompany soft or stained fascia, recurring overflow, detached gutters, visible roof-edge damage, or water collecting near the foundation. A professional can determine whether the issue is a failed joint, a drainage design problem, an undersized downspout, or a gutter system overwhelmed by debris.
For homeowners in Conway, North Myrtle Beach, Surfside Beach, Murrells Inlet, Pawleys Island, Georgetown, and nearby communities, local conditions matter. Pine trees can fill an open gutter quickly. Tropical downpours can expose inadequate drainage in minutes. Wind can deposit leaves and roof grit in corners and at downspout outlets where blockages are hard to see from the ground.
Clearwater Rain Gutters can inspect the gutter system, identify repair priorities, and recommend a solution based on the roofline, debris exposure, and drainage needs of the home. If the gutters are structurally sound but repeatedly clog, professionally installed GutterGlove stainless-steel micro-mesh protection can help keep leaves, pine needles, insects, and roof grit out while allowing rainwater to enter the system.
Prevent the Next Gutter Leak
Repairing a seam is useful. Preventing the repeated overflow that stressed that seam is more valuable. Open gutters need regular cleaning, especially after storms and during heavy leaf or pine-needle drop. They also need periodic checks for loose hangers, shifted downspouts, and deteriorating sealant.
Gutter protection can reduce the debris burden and limit the need to climb a ladder for routine cleaning, but it should be selected and installed for the home’s roof and local conditions. Fine stainless-steel micro-mesh is designed to stop small debris that can clog conventional gutter covers, while professional installation helps ensure water follows the roof edge into the gutter instead of overshooting it.
A dry fascia board, stable foundation soil, and clean landscaping are often the first signs that a gutter system is doing its job. If you have repaired a leak but still see overflow in heavy rain, request a free inspection before the next storm turns a small drip into a larger repair.
Leave a Reply
You must be logged in to post a comment.